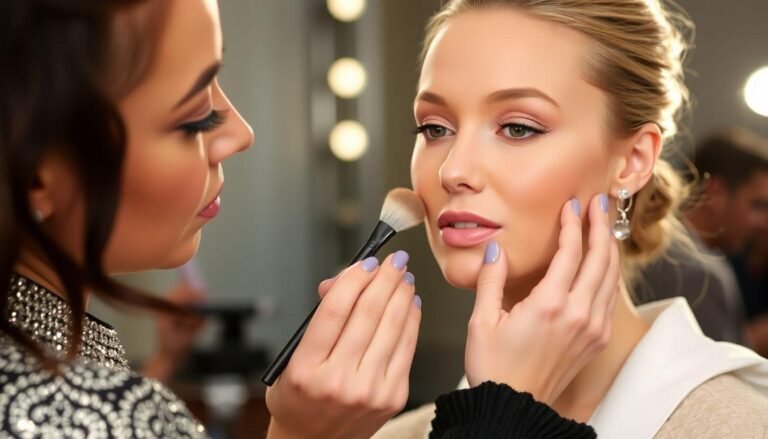
Ever wondered how celebrities achieve that red carpet-ready glow? The secret lies in the techniques used by professional makeup artists who know exactly how to enhance natural beauty. Whether you’re preparing for a special occasion or simply want to elevate your everyday makeup routine, understanding professional makeup artist tips and beauty tricks can transform your approach to beauty. These insider techniques aren’t just about applying products—they’re about creating a flawless canvas that highlights your best features while concealing imperfections. Let’s explore ten professional secrets that will help you achieve magazine-worthy looks without needing a glam squad on standby.
Prep Like a Pro: The Foundation of Flawless Makeup
Makeup artists know that exceptional makeup starts long before the first drop of foundation touches your skin. The prep work makes all the difference between makeup that looks cakey and makeup that appears seamlessly blended.
1. Skincare First, Makeup Second
Professional makeup artists always prioritize skin prep. Before reaching for any makeup product, cleanse and moisturize your face thoroughly. Wait about five minutes after applying moisturizer to allow it to fully absorb. This creates the perfect canvas for your makeup application.
“I never start makeup without proper skin prep,” says celebrity makeup artist Lisa Eldridge. “The better your skin looks before makeup, the better your makeup will look.”
Application Techniques That Make a Difference
2. Layer Your Foundation Strategically
One common mistake is applying foundation all over your face at full coverage. Instead, use thin layers and build up only where needed.
Start with a small amount of foundation in the center of your face and blend outward. Add extra coverage only on areas that need it, like redness around the nose or blemishes. This technique creates a more natural finish that looks like skin, not makeup.
3. The Concealer Triangle Trick
Rather than just dabbing concealer directly on dark circles, try drawing a triangle shape with the base under your eye and the point toward your cheek. This technique brightens the entire under-eye area and lifts the appearance of your face.
Blend the concealer with your ring finger or a damp makeup sponge, using gentle patting motions rather than rubbing.
Eye Makeup Secrets for Defined, Alluring Eyes
4. Master the Art of Blending Eyeshadow
The difference between amateur and professional eye makeup often comes down to blending. Use a clean fluffy brush to softly blend harsh lines between colors.
Work with at least three complementary eyeshadow shades:
The key is to blend until there are no visible lines between colors—just a seamless gradient of shade.
5. Tightlining for Fuller-Looking Lashes
Want to make your lashes look instantly fuller without falsies? Try tightlining—applying eyeliner directly to your upper waterline. This fills in the tiny gaps between lashes at the root, creating the illusion of thicker, more luscious lashes.
Use a waterproof gel or pencil liner and gently lift your upper lid to apply the product as close to the lash line as possible.
Contouring and Highlighting the Smart Way
6. The 3-E Method for Foolproof Contouring
Forget complicated contouring charts. For everyday definition, follow the “3-E” method: sweep bronzer or contour powder in the shape of a “3” on each side of your face, hitting the forehead, cheekbone, and jawline.
Use a fluffy brush and build the color gradually—it’s much easier to add more than to remove excess product.
7. Strategic Highlighting for a Natural Glow
When it comes to highlighter, less is more. Apply it only to the high points of your face that naturally catch light:
For daytime looks, opt for a subtle, pearlescent highlighter rather than chunky glitter for a more sophisticated finish.
Lipstick Application That Lasts
8. The Blotting Technique for Long-Wearing Lip Color
For lipstick that lasts through meals and conversations, try this pro technique:
1. Apply lip liner all over lips as a base
2. Apply one layer of lipstick
3. Blot with a tissue
4. Dust a tiny amount of translucent powder over the tissue while it’s still on your lips
5. Apply a final layer of lipstick
This multi-layer approach creates a stain effect that stays put much longer than a single application.
Final Touches for Perfection
9. Set Your Makeup with Purpose
Not all areas of your face need the same amount of setting powder. Use a light hand and focus on areas that tend to get oily, typically the T-zone (forehead, nose, and chin).
For areas that naturally appear more dry, like the outer perimeter of the face, skip the powder altogether to maintain a natural dewiness.
10. The Finishing Spray Difference
The secret weapon in many professional makeup kits is setting spray. Not only does it help your makeup last longer, but it also melds all the layers together for a more unified, skin-like finish.
Hold the bottle about 8-10 inches from your face and spray in an “X” and “T” formation for even coverage. Let it dry naturally without fanning or touching your face.
The right setting spray can transform powder products to appear more natural and skinlike, eliminating any potential cakiness or powdery finish.
Bringing It All Together
Mastering these professional makeup tips and beauty tricks takes practice, but the results are well worth the effort. Remember that the goal isn’t perfection but enhancement—letting your natural beauty shine through while minimizing concerns. Start by incorporating one or two of these techniques into your routine and gradually add more as you become comfortable.
The most important beauty trick of all is confidence. When you feel good in your skin, it shows—regardless of how much or little makeup you’re wearing. These professional techniques are simply tools to help you express yourself and feel your best, whether you’re heading to a special event or just want to elevate your everyday look with some flawless makeup artist techniques.


