Have you ever looked at expensive skin lightening products and wondered if there’s a more natural, affordable alternative? You’re not alone! Creating your own DIY skin lightening soap at home is becoming increasingly popular among women who want control over what goes onto their skin. With simple ingredients from your kitchen or local health store, you can craft personalized soaps that brighten your complexion without harsh chemicals. Let’s explore how you can make these gentle yet effective soaps that might just transform your skincare routine.
Why Make Your Own Skin Lightening Soap?
Store-bought skin lightening products often contain controversial ingredients like hydroquinone or mercury, which can cause long-term skin damage. When you make soap at home, you control exactly what goes into it. Natural ingredients like turmeric, licorice root, and vitamin C can gently lighten dark spots and even out skin tone without the risks associated with commercial products.
Home-made soaps are also:
Essential Ingredients for Effective Skin Lightening Soap
The secret to effective skin lightening soap lies in choosing ingredients with natural brightening properties. Here are some star players to consider:
Citrus-Based Ingredients
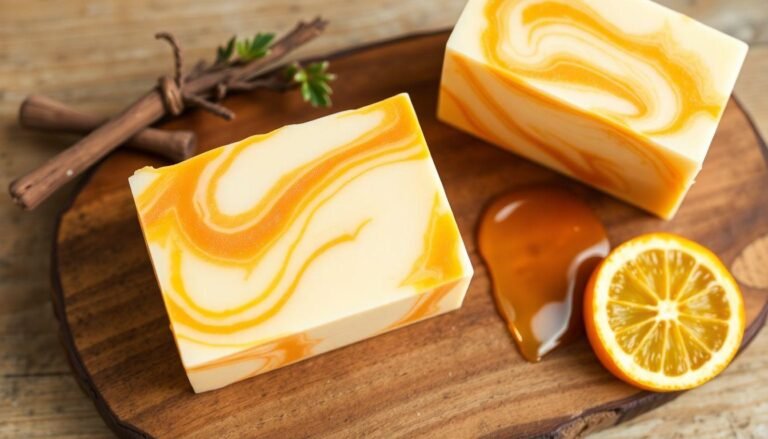
Citrus fruits contain natural acids that gently exfoliate and brighten skin. Lemon juice, orange peel powder, and vitamin C powder are excellent additions to your soap. These ingredients help reduce hyperpigmentation and give your skin a healthy glow.
Natural Lightening Agents
Several natural ingredients have been used for centuries to even skin tone:
Moisturizing Bases
A good skin lightening soap should never strip your skin. Include these moisturizing ingredients:
Basic Melt-and-Pour Skin Lightening Soap Recipe
Let’s start with a simple recipe that doesn’t require handling lye, making it perfect for beginners.
What You’ll Need:
Instructions:
1. Cut the soap base into small cubes and place them in a microwave-safe bowl.
2. Microwave in 30-second intervals, stirring in between, until completely melted.
3. Let cool slightly, then add the lemon juice/vitamin C powder, turmeric, honey, and essential oil.
4. Stir well to combine all ingredients, making sure there are no clumps.
5. Pour the mixture into your soap molds.
6. Allow to cool and harden completely (usually 2-4 hours).
7. Remove from molds and wrap in wax paper if not using immediately.
Advanced Cold Process Turmeric and Yogurt Soap
For those with soap-making experience, this cold process recipe yields a more customized product.
Safety Note:
This recipe involves working with lye, which is caustic. Always wear gloves, protective eyewear, and work in a well-ventilated area.
What You’ll Need:
Instructions:
1. Prepare your workstation with all necessary safety precautions.
2. Slowly add lye to water (never water to lye) in a heat-resistant container, stirring until dissolved. Set aside to cool.
3. Melt coconut oil, olive oil, shea butter, and castor oil together.
4. When both the lye water and oils reach about 100-110°F (38-43°C), slowly pour the lye water into the oils while stirring.
5. Blend with an immersion blender until reaching “trace” (pudding-like consistency).
6. Add yogurt, turmeric, licorice root powder, and vitamin E oil. Blend briefly to incorporate.
7. Pour into prepared molds and insulate with towels.
8. After 24-48 hours, unmold and cut into bars.
9. Cure the soap for 4-6 weeks in a cool, dry place before using.
Tips for Getting the Best Results
Patch Testing
Always test new ingredients on a small area of skin before using your homemade soap all over. Even natural ingredients can cause reactions for some people.
Consistency Is Key
Like any skincare product, results take time. Use your soap consistently for at least 4-6 weeks before expecting visible results.
Sun Protection
Many skin-lightening ingredients make your skin more sensitive to the sun. Always use sunscreen during the day when using these products.
Storage Tips
To extend the life of your homemade soap:
When to Expect Results
Natural skin lightening is a gradual process. Most people notice subtle improvements after 2-3 weeks of consistent use, with more significant results appearing after 8-12 weeks. Patience is essential with natural remedies!
Remember that these soaps work best on surface-level hyperpigmentation like sun spots or acne marks. They may not dramatically change your natural skin tone, and that’s actually a good thing—natural, even-toned skin is the healthiest goal.
Conclusion
Making your own DIY skin lightening soap allows you to harness the power of natural ingredients while avoiding potentially harmful chemicals. Whether you choose the simple melt-and-pour method or venture into cold process soap making, you’re creating a personalized skincare product tailored to your needs. The journey to brighter, more even-toned skin doesn’t have to involve expensive products or questionable ingredients. With some basic supplies and a little patience, you can craft effective soaps that care for your skin naturally. Remember that beautiful skin comes from consistent care, a healthy lifestyle, and embracing your natural beauty—your homemade soap is just one part of that journey to healthier, brighter skin.


