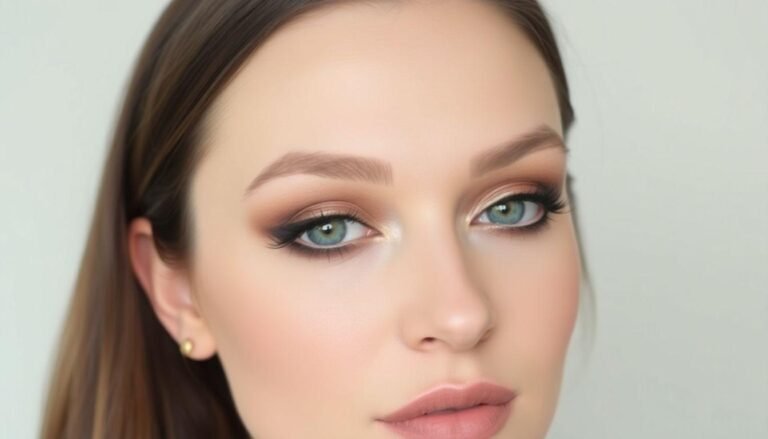
The smokey eye has endured as an iconic makeup look for decades, and for good reason. It’s dramatic yet sophisticated, sultry yet elegant. But for those with fair skin, creating the perfect smokey eye can feel like walking a tightrope—too heavy and you risk looking overdone, too light and the impact is lost. Don’t worry! I’ve spent years perfecting the technique for fair skin smokey eye looks, and I’m excited to share my foolproof method that flatters lighter complexions beautifully. With just five straightforward steps, you’ll be rocking this classic look in no time.
Why Fair Skin Requires a Special Approach to Smokey Eyes
Let’s face it—not all makeup techniques are one-size-fits-all. Fair skin presents unique considerations when creating a smokey eye. The high contrast between darker eyeshadows and pale skin can sometimes appear harsh or overwhelming if not applied thoughtfully. The trick lies in building intensity gradually and choosing the right shades that complement rather than overpower your natural coloring.
Many makeup lovers with fair skin shy away from smokey eyes altogether, fearing they’ll end up looking like they’ve been in a boxing match! But with the right technique and color selection, a smokey eye can actually be incredibly flattering on lighter skin tones, bringing focus to your eyes while maintaining a balanced look.
Step 1: Prep Your Canvas
Before diving into shadow application, proper preparation is essential for longevity and seamless blending.
The Essential Eye Primer
Start with a quality eye primer applied all over your lids. Fair skin often reveals the tiniest imperfections, and primer creates a smooth base while preventing creasing and fading. Apply a small amount from lash line to brow bone, and don’t forget to prime under the lower lashes if you plan to smoke out your lower lash line.
Primer also intensifies shadow pigments, which is particularly helpful when working with lighter skin tones where colors can sometimes appear washed out. Allow the primer to set for about 30 seconds before moving on—this gives it time to create that perfect tacky surface for shadow adhesion.
Step 2: Create Your Base Layer
The foundation of any great smokey eye begins with the right base shade.
Choosing Beginner-Friendly Shades
For fair skin, avoid jumping straight to black shadow—it’s usually too harsh as a starting point. Instead, opt for medium-toned neutrals like taupes, soft browns, or even mauve shades. These create dimension without overwhelming your complexion.
Apply this medium shade all over your mobile lid (the part that moves when you blink), using a flat shader brush for maximum pigment deposition. Don’t worry about precision yet—we’ll be blending everything out beautifully in later steps.
Step 3: Add Depth in the Crease
Now comes the step that really creates that signature smokey effect—adding depth to your crease.
Crease Work Techniques
Using a fluffy blending brush, take a shade that’s 2-3 shades darker than your base color. For fair skin, this might be a medium-dark brown, deep plum, or rich bronze. Using light, windshield-wiper motions, apply this darker shade into your crease, focusing the most intensity on the outer corner.
The key here is building intensity gradually—it’s much easier to add more color than to remove excess! Keep your eyes open while applying crease color to ensure you’re placing it where it will actually be visible with your eyes open.
Step 4: Intensify the Lash Line
A hallmark of the smokey eye is intensity along the lash line, which creates depth and makes lashes appear fuller.
Liner Techniques for Fair Skin
Using a small, precise brush, take your darkest shade (which could be a deep brown, charcoal, or even black for evening looks) and press it along your upper lash line. For fair skin, I often recommend starting with dark brown rather than black for daytime smokey looks—it provides definition without harshness.
Smudge this darker color upward slightly to blend with your other shadows. You can also run this same color along the lower lash line, keeping it close to the lashes and connecting it with the outer corner of the upper lash line. Remember, you want the intensity to gradually fade as you move inward toward your tear duct.
For added definition, you can apply a pencil liner to your waterline. Fair skin tones often look lovely with a deep brown or even a navy liner rather than stark black.
Step 5: Perfect the Blend and Add Final Touches
The final step is all about refining your look and adding those finishing touches that elevate your smokey eye from good to stunning.
Blending Is Everything
Take a clean fluffy brush (no additional product) and blend all the edges where colors meet. There should be no harsh lines—just a beautiful gradient of color from lightest to darkest. This step is absolutely crucial and might take a minute or two, but it makes all the difference.
Next, take your lightest shade (a matte cream or soft champagne) and apply it to your brow bone and inner corner to brighten and lift the eye. This creates beautiful dimension and helps balance the darker elements of your smokey eye.
The beauty of this technique is its versatility. Once you’ve mastered these five steps, you can adjust the color palette to create different smokey eye variations—from soft daytime looks with taupes and browns to more dramatic evening styles with plums or navy blues.
Remember, practice makes perfect! Don’t be discouraged if your first attempt isn’t magazine-worthy. The perfect smokey eye for fair skin takes some practice, but once you’ve got the technique down, it’s a timeless look you’ll return to again and again. Your fair complexion can absolutely rock this sultry eye style—it’s all about finding the right balance and technique for your unique features.


