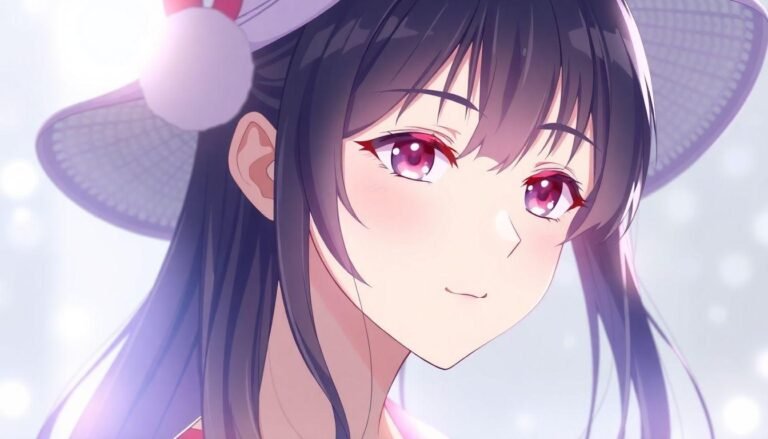
Anime art has captivated millions around the world with its distinct visual style, particularly in how it renders skin tones and textures. Whether you’re an aspiring digital artist, a seasoned illustrator looking to expand your repertoire, or simply someone who appreciates the aesthetic charm of anime, mastering anime skin rendering can transform your artwork from amateur to professional. The techniques used to create that perfect balance of simplicity and depth are accessible to anyone willing to learn, regardless of your current skill level.
Understanding the Basics of Anime Skin Rendering
Before diving into techniques, it’s important to understand what makes anime skin unique. Unlike realistic art styles that focus on capturing every pore and imperfection, anime skin tends to be smooth, luminous, and somewhat idealized. This doesn’t mean it lacks dimension or character—quite the opposite!
Traditional anime skin has a few key characteristics:
The magic of anime skin isn’t in replicating reality but in creating a stylized interpretation that feels cohesive with the overall aesthetic. You know what’s interesting? Even though anime skin looks simple at first glance, achieving that perfect balance takes considerable skill and practice.
Choosing the Right Colors for Realistic Anime Skin
Color selection plays a crucial role in creating convincing anime skin. Have you ever noticed how some anime characters’ skin seems to glow from within? That’s not an accident!
Base Color Selection
When selecting your base skin tone, avoid colors that are too saturated or too bright. Anime skin typically uses slightly muted tones that lean toward peach, ivory, or light brown, depending on the character’s ethnicity or the artistic style you’re emulating.
For fair skin, try starting with a soft peach or pale ivory rather than pure white. For medium to dark skin tones, begin with rich browns with subtle undertones of red, yellow, or olive, depending on the character.
Understanding Color Temperature
Temperature matters tremendously in stunning anime skin rendering. Warmer tones (those with more yellow or red) can make a character appear more lively or energetic, while cooler tones (with hints of blue or gray) might suggest elegance, mystery, or even illness depending on the context.
Consider your character’s personality and the mood of your illustration when choosing your color palette. A cheerful character might benefit from slightly warmer skin tones, while a mysterious or aloof character might look appropriate with cooler undertones.
Mastering Light and Shadow Techniques
The true essence of anime skin comes alive through lighting. Unlike realistic art, anime often uses simplified shadow shapes while still maintaining three-dimensionality.
Cell Shading vs. Soft Shading
There are two primary approaches to shading anime skin:
While classic anime often uses cell shading, modern anime styles frequently incorporate softer transitions for a more dimensional look. Many artists combine both techniques—using cell shading for primary shadow shapes and soft shading for subtle transitions.
Placement of Highlights
Highlights bring anime skin to life! Traditional placement includes:
Remember, less is more with highlights. Too many bright spots can make your character look sweaty rather than luminous. Think of highlights as your character’s “glow points”—areas where their inner radiance shines through.
Digital Tools and Techniques
Today’s digital art programs offer tremendous advantages for creating beautiful anime skin.
Layer Management
Organize your work with a strategic layer system:
This approach allows you to adjust each element independently without destroying your original work—perfect for experimenting with different lighting scenarios.
Brush Selection
The right brushes can make a huge difference in your workflow:
Many artists create custom brushes specifically for skin rendering. Don’t be afraid to experiment and develop your own toolkit that feels comfortable and produces results you love.
Common Mistakes to Avoid
Even experienced artists sometimes fall into these traps:
Overshading
Anime skin typically maintains large areas of the base tone with strategic shadows. Too much shading can make your art look muddy and lose that distinctive anime clarity. Remember that simplicity is part of the charm!
Incorrect Shadow Colors
Avoid using pure black or gray for shadows. Instead, try darker, slightly more saturated versions of your base color, or incorporate complementary colors for more dynamic shadows. For example, skin with peachy undertones might have slightly purple-tinted shadows.
Inconsistent Light Source
Decide where your light is coming from and stick with it! Inconsistent shadows quickly break the illusion of three-dimensionality and can make your artwork look amateurish.
Developing Your Own Style
While learning the foundations is essential, developing your personal approach to anime skin rendering will set your artwork apart. Study your favorite anime artists and analyze how they handle skin—not to copy, but to understand their techniques and incorporate elements you admire into your own unique style.
Ask yourself: Do you prefer the high-contrast look of shows like “Demon Slayer,” or the softer, more nuanced approach seen in Studio Ghibli films? There’s no right answer—only what feels authentic to your artistic voice.
Remember that mastering any art technique takes time and practice. Be patient with yourself, celebrate small improvements, and enjoy the creative journey. With dedication and these fundamental techniques, you’ll be creating beautifully rendered anime skin that captures the essence of this beloved art form while showcasing your personal artistic vision.


