The art of capturing the diverse beauty of human skin tones has challenged artists for centuries. Whether you’re sketching a portrait of a loved one or creating characters for your graphic novel, mastering how to blend skin tones is essential for creating lifelike, dimensional artwork. Unlike other subjects, skin requires a nuanced approach that balances color theory with subtle transitions. In this guide, I’ll walk you through how to blend skin tones drawing with techniques that will transform your portraits from flat to fabulous in just five simple steps.
Why Blending Skin Tones Is So Important in Portrait Drawing
When I first started drawing portraits, my biggest challenge wasn’t capturing likeness—it was making skin look real. Skin isn’t a single flat color; it’s a complex surface with undertones, highlights, and shadows that vary based on lighting, ethnicity, and even emotional states. Learning to blend these subtle variations is what separates amateur sketches from professional artwork.
The human eye is incredibly sensitive to how skin should look. We interact with people daily, so we intuitively notice when skin tones in artwork appear unnatural. That’s why mastering the art of blending is crucial—it’s the difference between a drawing that looks stiff and one that seems to breathe with life.
Essential Supplies for Blending Skin Tones
Before diving into techniques, let’s make sure you have the right tools for the job:
If you’re working with colored pencils, invest in a skin tone set that includes warm and cool variations. Brands like Prismacolor and Faber-Castell offer excellent options. For digital artists, a pressure-sensitive tablet and software with good brush customization (like Procreate or Photoshop) will be your best friends.
The 5 Simple Steps to Master Skin Tone Blending
Step 1: Identify the Base Tone and Undertones
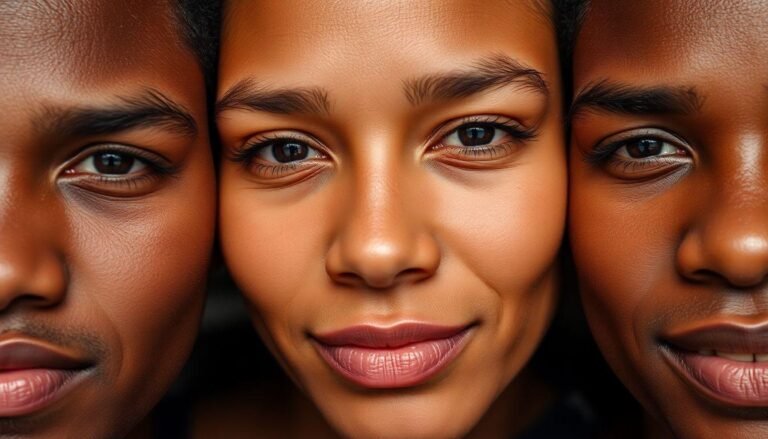
Every person’s skin has a base color and underlying tones that give it character. Look carefully at your reference and ask yourself: Is the skin warm (yellow/golden/olive undertones) or cool (pink/red/blue undertones)? Mediterranean skin often has olive undertones, while Northern European skin might have more pink. African skin tones usually have beautiful warm undertones ranging from golden to reddish-copper.
Start with a light application of your base tone, covering the entire skin area. This creates unity in your portrait and gives you a foundation to build upon. Remember that even the darkest skin tones should start with a light application that you can gradually build up.
Step 2: Map Out Your Light and Shadow Areas
Lighting creates dimension in your portrait. Identify where light hits the face directly (highlights), where it falls at an angle (mid-tones), and where it doesn’t reach at all (shadows). Lightly sketch these areas—don’t worry about blending yet.
A common mistake is making shadows too dark too quickly. Shadows on skin are rarely pure black; they usually contain color information from the skin itself and reflect colors from the environment. For warm skin tones, shadows often appear slightly cooler, while cool skin tones may have warmer shadows.
Step 3: Layer Colors Gradually
Here’s where the magic begins. Instead of pressing hard with one color, build up layers gradually:
For graphite drawings:
– Start with an HB pencil for mid-tones
– Use 2B-4B for developing shadows
– Reserve 5B-6B for only the deepest shadows
For colored pencils:
– Layer complementary colors to create depth
– For example, add hints of purple in shadows for olive skin, or blue for warm brown skin
Apply each layer with light, circular motions or cross-hatching. The key is patience—rushing this step often results in muddy, unnatural skin tones.
Step 4: Blend with the Right Technique
Now for the crucial blending step. Use your blending stump or tortillon to gently smooth the transitions between your colors. Move in small circular motions, working from light areas into darker ones.
Digital artists can use soft brushes with low opacity, building up color gradually. The brush pressure sensitivity on your tablet becomes essential here for creating natural transitions.
Remember that different areas of the face require different blending approaches:
– Forehead and cheeks: Broad, gentle blending
– Around eyes and nose: More detailed, careful transitions
– Lips: Distinct edges with softer blending in the center
Step 5: Refine with Highlights and Final Details
The final step elevates your portrait from good to great. Use your kneaded eraser to lift graphite for subtle highlights on the forehead, nose bridge, and cheekbones. For colored pencil artists, a white pencil or gel pen can add those crucial catching highlights.
Pay special attention to areas where skin shows translucency—the tips of ears, nostrils, and fingers often appear slightly reddish as light passes through them. Adding these subtle details creates the impression of skin that’s not just colored correctly but feels alive.
Common Mistakes to Avoid When Blending Skin Tones
Even experienced artists can fall into these traps:
Remember that real skin has variations—freckles, slight redness around the nose, blue veins visible at the temples or wrists. Including these imperfections actually makes your portrait more realistic, not less.
Practice Exercises to Improve Your Skin Tone Blending
Like any skill, blending improves with deliberate practice:
Start with simpler lighting before attempting dramatic effects like sunset lighting or strong side lighting that creates more complex color interactions.
Conclusion
Mastering how to blend skin tones drawing is a journey rather than a destination. Each portrait you create will teach you something new about how light interacts with skin and how to capture its living quality. These five steps provide a solid foundation, but your artistic eye will continue to develop with every face you draw. Remember that the goal isn’t perfection but authenticity—skin that looks like it could warm to the touch. Keep practicing, experimenting with different techniques, and soon you’ll find yourself creating portraits with skin tones that truly come alive on the page. Whether you’re drawing for personal enjoyment or professional development, these skills will elevate your artwork to new levels of realism and expression.


